Emulator Version Step By Step Guide
How to Setup LastWar Bot in 7 Easy Steps
No Experience ? No Problem
If you find the steps below confusing or tricky to follow, just let us know — we’ll gladly take care of everything for you. We’ll install the emulator, the game, and setup the lastwar bot for you.
All you need to do is install UltraViewer and watch while we handle it — no extra cost at all. 😊

Please Make SureTo Read All the Steps
Step 1
Download an Android Emulator
Step 2
Configure the Emulator Settings
BlueStacks
LDPlayer
Memu
Step 3
Install & open LastWar Survival
THIS IS IMPORTANT TO DO:
- Please open the LastWar Survival game and don`t navigate anywhere.
- Please change your game language to English.
- Please don`t zoom in OR zoom out once the game open , because the bot will do the job.
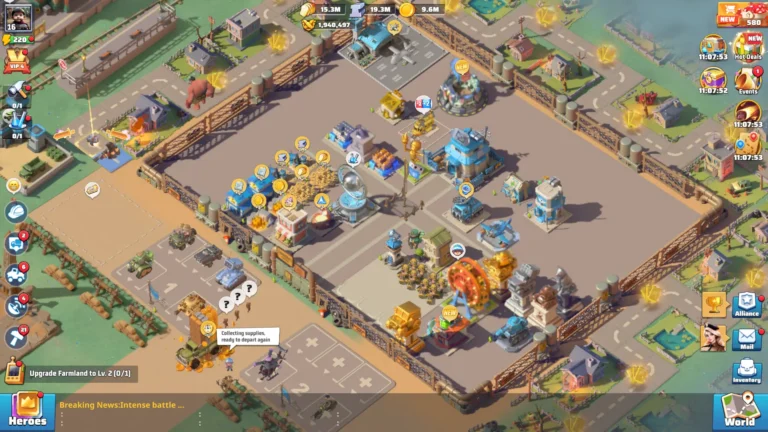
Force Landscape Mode
Please make sure the game runs in landscape mode like this image if it runs in portrait mode please Enable Force Landscape.

Step 4
Register on the LastWarBot.com
- Please Note: you can use any email address to register ( It doesn`t have to be the game account Email ).
- Once you register the Free trial will be added automatically to your registered Email address.
Step 5
Download and Extract LastWar Bot
- Very Important notes :
1- Don`t add the bot folder in One Drive, Nor Downloads folder or any place needs admin privilege.
2- If you don`t have One Drive you can add it on Desktop.
3- If you don`t know what are these then just add the folder in C: ( open C: partition and add it immediately ) or D: partition.
4- You can run the bot as admin.
Step 6
Login and Connect to Your Emulator
Once you’ve extracted the bot as shown in the previous step, open the folder and double-click the LastWarBot.exe file to launch the bot.
You’ll now see the login screen. Enter the email and password you used to register on our website.
Make sure to check the “Remember Me” box so you don’t have to enter your credentials every time you open the bot.
This is very Important to do
Once logged in, the bot will open and wait for you to choose your emulator THEN your instance and press connect to connect with the desired emulator instance.
At min 1:26 it shows how to connect the bot to the emulator
How to open more than 1 bot on the same pc (UNLIMITED)
Step 7
Configure Bot Settings Before Starting
Once your bot is connected to the emulator, it’s time to set up your preferences before pressing Start.
ONLY PRESS START ON THE PAGE YOU WANT THE BOT TO START WITH.
Go through each settings page and configure them as you like:
🔹 Daily Tasks Page
Choose which daily tasks you want the bot to complete. After selecting, go to the next page.
🔹 Rally Page
Set your rally preferences like Doom elite or Zombie ( Gold zombies has no option to set level as they are all levels 10 ) level, Stamina usage, etc.). Then go to the next page.
🔹 Auto Digs & Eggs Page
Configure how you want the bot to handle digging and eggs. Then go to the next page.
🔹 Auto Join Rally
Choose which squads to join rally with,
enable all the bosses you want the bot to join their rallies if found,
set the range of boss levels ( if you choose minimum level 1 and maximum 100 it will join in all levels between level 1 and 100 )
enable or disable auto heal
Once you’ve set your preferences:
✅ To run Daily Tasks, go to the Daily Tasks tab and press Start
✅ To do Auto Digging, go to Digs & Eggs tab and press Start
✅ To hunt with Stamina, go to the Rally tab and press Start
✅ To Auto Join Rallies, go to the Auto join rally tab and press Start
